Showing posts with label blogging. Show all posts

Saturday, April 28, 2012

Sage in the City

Hello nail bloggers/readers!! I hope you all are having a fantastic day!!

Yesterday I picked up a little something at my local Walgreens. Wet n Wild came out with their Summer Getaway line, put the polishes in tiny 5mL bottles, and packaged them all together for $3.99. Great price for me! I also really enjoy smaller bottles. That way if I hate the color, I don't feel bad for spending more on one polish.

 They all have super clever names...or at least I'm sure Wet n Wild thought they were clever. I only have an issue with one of the names.

In this kit you get:
Buffy the Violet Slayer: This is a gorgeous purple color.
I haven't tried all of these...well, honestly, I've only tried one, but I'm planning on swatching all of these through out the week. This is a darker purple color, that appears to have lots of shimmer.

9.0.2.1.Orange: Looks like an orange jelly with lots and lots of orange glitter. I'm excited to try this one!

FuchsiaRama: This one looks more purple to me in the bottle. It looks like a creme polish...but who knows, it might lighten up to a dark fuchsia. (I love this name because I am a huge Futurama fan. lol)

How I Met Your Magenta: This honestly does not look magenta to me. It is hot pink. It is a cute pink, with lots of shimmer. I can't wait to swatch this one for ya.

The Wonder Yellows: This one looks to be a yellow frost with lots of shimmer. I'm excited about this one too..but I have a feeling I will need a more opaque polish to go under it.

And finally, the color that I have swatched for you today:

Sage in the City.

First of all: I do not wear green. I don't think it looks good on my fingers or with my skin. I have an olive skin tone...so I feel like it draws out the green in my skin color.

Second: Nice try Wet n Wild. Trying to be so clever made you look like you're colorblind. THIS IS NOT SAGE. This is almost lime green! We'll call it a dark lime green. I do like this color, but the name really bothers me. Whoever made this color and was like "Hey guys, let's call this SAGE IN THE CITY! Get it? A spin off of SEX IN THE CITY! GENIUS!" is an idiot. They could have called it Glime...like GLEE with lime, or Lime and Order. Or what about The LIME word. Sigh.

Anyway, on to the polish.

I found this polish to be awfully thick. And it left visible brush strokes. The good part was it only took two coats to become completely opaque. I really really really DO like this color! A lot! I wish it looked good on me, cause I would wear it all the time!!

All of these photos were taken with my flash...as it is night time. (I'm going to be super busy this weekend, so I am swatching and writing my posts and post dating them for the actual day I want it posted. Pretty genius Blogger. Kudos to you for making this function for us crazy busy moms.)

I also think their Fastdry technology isn't really that fast. They advertise that one coat will dry in 60 seconds. But with my one coat of Sally Hansen's Double Duty base coat, two coats of Sage in the City, and one coat of Seche Vite, I don't feel like it dried all that fast. After a few minutes, it felt dry, but was dentable. But then again, it was a pretty thick polish. Maybe I got a bad batch.

What do you all think of this color? Do you think I should brave green, and wear it more often? Is it just my eyes that see how terrible it looks on me??

Until next time....

Christina

Ps:
My Mercury Twilight took a few hours before chipping. :( Boo. But I really think it was because I had my hands in water a lot.


Disclosure *I was not paid for this review. I was not given the polish for this review. I paid for the polish with my own money. This is purely my own opinion, thoughts, and suggestions about this polish.*

Friday, April 27, 2012

Hologram Effect

Good afternoon nail polish lovers!

Do you love hologram polishes? Who doesn't? I know I am in loooove with hologram effects!! I have a hologram manicure to share with you!

I picked up Layla's Hologram Effect polish in Mercury Twilight, as I'm sure you all know from a previous post. I decided to layer it upon itself, and build up a pure hologram manicure.

Here is Mercury Twilight by itself, in my house with the flash on.

My process:
1 coat Sally Henson's Double Duty base coat
4 coats Layla Mercury Twilight
and no top coat for the naked hologram manicure.

I love AND hate this polish.
Here's why:
I love the effect it does. I love the rainbow. LOOOVE the rainbow. But the polish is extremely streaky. And building it up was a pain in my booty. I had to basically glob on this polish. If I applied it like normal polish, it would create bald spots. Anyone else have this problem with this polish? Any tips/tricks? Luckily this polish isn't uber thick, so 4 coats feels like one.

Here is the gorgeousness in sunlight. I really do like how this polish looks once it is on. But fighting with it, just made me wonder if it was REALLY worth the $15.50 I spent on it.

Seriously...if you guys have any insight on this polish...I need to know how to manage it better!!!

Seeing how beautiful it is, really makes me sad that I spent over 30 minutes just building it up.

After I let that dry, which was literally no time flat...I added a design.

This polish dries insanely fast. Like...crazy fast. There was no wait time. Even when I globbed it on into a thick coat.

I then used my bundle monster plate BM-209 and added a design with my Konad Special Polish in black.

After adding the design, I used a pretty thick coat of Seche Vite to protect the stamping. The Seche Vite did react weird with the hologram polish. I think it just dulled it down a tad. Not a whole lot, in my opinion. I like my nails to be pretty glossy, unless I am shooting for matte. So, adding the Seche Vite was a good move in my book.

This design makes me think of fishnet stockings. LOVE IT.

All in all, even after fighting with Mercury Twilight, I really like this manicure. I like how fast it dried. I love the stamping. I love love love the rainbow. I love everything about it. Now I will be putting this polish to the test...I haven't worn it long enough to know how long it'll take to chip. So I will be reporting that info on my next post.

I would really like some feedback about this Mercury Twilight polish. Do you own it? Do you own the other colors from this line? Do you love it or hate it?

Until next time....

Christina


Disclosure *I was not paid for this review. I was not given the polish for this review. I paid for the polish with my own money. This is purely my own opinion, thoughts, and suggestions about this polish.*

Ruby Pumps

Hello all!!! I have a fabulous polish to share with you!!!

First, let me say this: I do not normally turn to red polish. Why? It is a pain to clean up, it stains your nails, and I tend to think it is boring by itself.

Now....let me tell you why this polish, Ruby Pumps by China Glaze, has changed my mind about red polishes FOREVER.

China Glaze Ruby Pumps is fabulous. The red is such a great shade. The glitter is glitter-tastic! And surprisingly, the clean up was CAKE! I love the formula to this polish. It just glides on. The brush is perfect...even for this tiny bottle! I had picked up this 3.6 mL bottle at Sally's Beauty Supply a few weeks ago. It was in the clearance bin for $1.69. It then was discounted even further, and I got this bad boy for $0.49!!!! Can't beat that price!!! Now that I have tried it, I seriously need to pick up a bigger bottle!!!

Now in the photos, this manicure is a few days old, so I have a few chips, scuffs, and tip wear. But I am happy with how well this polish has held up! I couldn't bring myself to add anything to this manicure, for fear of taking away from this gorgeous polish. I can't even describe how much this polish sparkles.

It appears to be a red jelly polish with lots and lots of glitter. I can't tell if the glitter is actually red or silver....but I am assuming red. Here's what I did:
2 coats Sally Hansen's Double Duty Base Coat
2 coats China Glaze Ruby Pumps
1 coat Seche Vite

Can you believe I got this opaque in TWO coats??? Amazing!

This is officially my go to nail polish! I am sooo in love!!! <3

Have you guys tried Ruby Pumps? What do you think of it? I have read mixed reviews on this polish...but people who hate it really haven't explained why. Maybe I need to search better?

Until next time....

Christina


Disclosure *I was not paid for this review. I was not given the polish for this review. I paid for the polish with my own money. This is purely my own opinion, thoughts, and suggestions about this polish.*

Tuesday, April 24, 2012

Skin/hand care

Good morning nail bloggers!!!! I want to share something pretty important to me, with you.

My skin/nail moisturizing ritual...if you will. I take keeping care of my skin and nails pretty seriously. Moisturizing your skin can keep you looking young, and makes you feel so much better. I have a few products to share with you all. I know this isn't a polish post..but I find this equally as important.

Here's what I do every day:

I use Solar Cuticle Oil every single day, several times a day. I keep it at my desk, and move it around the house so I have access to it at all times. I would like to buy another cuticle oil to keep in my purse that isn't a liquid, but I just haven't had the time to search for one. Any suggestions?


I moisturize with EOS ( evolution of smooth) nourish revitalizing care; hand and body lotion. I found this lotion at Walgreens one day. It was on sale, and I had heard great things about EOS, so I gave it a shot. I love this stuff. First, it smells amazing. I love love love the scent. I put it on all over my body every morning after showering. I wish I could find a body spray that smells exactly like this lotion. I also use it through out the day as needed. I like to have soft hands, so I tend to use a lot of lotion. 


Every night, I use Julep's glycolic hand scrub before bed. I really like this product. It exfoliates my hands but it isn't too rough. Too much exfoliation can be bad for your skin. This has the right grit to it. It is a great great product. I've had it for a little while, and I totally suggest it. It is safe enough to use for every hand washing, but I like to save my product, so I only use it once a day. At night is the best time for me. I wash with it before I put on my nightly oils and lotions.


Every night, after scrubbing with Julep's glycolic scrub, I use Creativespa massage oil. I have had this oil for a long time. It came in my Creativespa pedicure and manicure kit. The kit includes a lot of products, that I will share with you in a future post. I only use those products every other week. They're a bit harsher in the exfoliation department for me to use every day. Back to the oil, I love love love this oil. As you can see, below, I still have a lot left! I use maybe a drop or two on my hands every night before bed. It is oil, so it will make your hands feel oily, but it really does moisturize your skin very very well. When I use this oil, I skip my cuticle oil. Mainly because I don't feel like need to double oil up my hands. This oil will moisturize your cuticles as well as all of your skin. I use my EOS lotion right after the oil. I only do this at night, because I don't want to leave oil smudges all over my house. And it does make your hands slippery. Plus I like that this stuff will work while I get my beauty rest.


This is my daily routine. It has helped my skin and my cuticles so much! I really swear by all of these products. I can't promise that all of these products are available to public purchasers. My Creativespa supplies were purchased at State, back before I let my cosmetology license expire. I really should go back to school for the X amount of hours to reinstate my license...but I just don't have time right now. Maybe one day...but I do not want to work in a salon again...it just wasn't my cup o tea.


I hope this has helped all of you. If you try it and it works for you, let me know! If it doesn't work for you, let me know! But please remember, it is SO important to moisturize your skin and nails. Especially if you use 100% pure acetone!

Until next time....

Christina

Monday, April 23, 2012

Folly

Good morning!! Sorry that I have been MIA. My husband left for deployment on Friday. So it has been a little rough around my house. My eldest has been acting out negatively from this deployment...so it has been pretty hard on momma!

I do have a pretty cute manicure for you all today. This manicure is a few days old, so I do have tip wear and a chip and broken corner on my index finger, all thanks to peeling potatoes.

Here's what I did:
2 coats of Sinful Colors Folly
Then I took every orange/coral/salmon/light pink/yellow I owned and used my dotter tools to add the dots.
Then I did a thick coat of Seche Vite.

I wanted the dots to be flat..and not look like paint over paint. I think I achieved that with the thick coat of Seche Vite.


I really like Folly. It could have gone on in one coat...which is a win in my book!!

I have never done polka dots before. I wanted them to be different sizes...and I think I did a pretty good job for my first polka dot job. :)

What do you all think? Do you like the color combo? The dots? Folly??

Until next time....

Christina


Disclosure *I was not paid for this review. I was not given the polish for this review. I paid for the polish with my own money. This is purely my own opinion, thoughts, and suggestions about this polish.*

Thursday, April 19, 2012

Gingerbread Man

The other day I went to Sally's Beauty Supply and I found a gem in the clearance boxes!!! Color Club's Gingerbread Man! Oh holy cow, do I loooove this polish.

As I was applying it, I thought I smelled gingerbread cookies. But I thought I was just psyching myself out, because of the name. But the more I smelled it, I had to google it. And sure enough! This is a scented polish from their 2011 Christmas line. I am SO glad I picked this one up for less than $3!

Now, I wanted to take photos of just the gingerbread man, but my hubby distracted me as I was doing my nails and I started stamping before I took pictures. But I think the stamping is subtle enough for you guys to see the beauty of Gingerbread Man. Sorry for not paying more attention. Boo on me.

I used Fingerpaint's Tiffany Imposter for the stamping. I'm really impressed with how opaque the polish was for stamping! Sometimes it is hard to find a stamping polish that isn't Konad's Special Polish.

Here's what I did:
1 coat Sally Hansen's Double Duty base coat
1 coat Orly's base coat
2 coats Color Club Gingerbread Man
1 coat Seche Vite
Stamping with Tiffany Imposter and Bundle Monster plate BM-223
1 coat Seche Vite

I have never used a Color Club polish before. I've heard wonderful things about their polish, but I have never been lucky enough to run into this brand until the other day. I have yet to find a local store that carries this brand.

Gingerbread Man is amazing. The formula is beautiful. It is completely opaque in 2 thin coats. Loooove that! It seems to be a foil type polish...which I love. My other gold is so thin, it takes like 3 or 4 coats to become opaque...and it doesn't have this foil goodness.

I will say, Gingerbread Man did take a while for it to dry. I messed up a few nails...but they aren't THAT noticeable. I don't know if it is because this polish is older or if it is just how it is made. But to me, it doesn't matter. I will take a few screwed up nails for this gorgeous color!

Loooooove Tiffany Imposter. One of my favorite polishes! <3


What do you all think about this manicure? Would you try it? If any of you know where I can find the rest of this Christmas line, let me know. I love having my fingers smell like cookies! <3

Until next time...

Christina


Disclosure *I was not paid for this review. I was not given the polish for this review. I paid for the polish with my own money. This is purely my own opinion, thoughts, and suggestions about this polish.*

Friday, April 13, 2012

Galaxy

I am sure you all are SO sick of seeing Galaxy nails...but I have never tried it...so here we go!

I would have loved to take photos with all the polishes I used...but I would end up with a lot of photos. If you are interested in the colors, I can photograph them together, and list them. But for now we will just call them by their color. Any combination of these colors will work!

Here's my process:
1 coat Sally Henson's Double Duty base coat.
1 coat Orly's base coat.
2 coats Pure Ice Black Rage.
I sponged on the design.
1 coat of Sinful Colors Queen of Beauty
1 coat of Seche Vite

 I used a white, yellow, pink, teal glitter, and a little bit of Hard Candy Beetle. I used my dotter for the white stars. Then added the silver glitter on top for more stars.

I learned how to do this manicure on Youtube. The link to the tutorial is HERE.

It was SOOO easy! Easier than I thought it would be. And I think it turned out beautifully! :D

And the surprising part of it all, this manicure does not feel thick at all. I was worried it would feel like I had a billion coats on...but not at all!!!!

I also found a new cure all for my yuck cuticles. As my readers, you know I have been fighting with them for about a month or so now. I found my cure!!!

Sally Hansen's Instant Cuticle Remover! This stuff is STRONG, so I only use it MAYBE once a week. I don't like to be harsh on my skin...so I try for once every other week. I love it! I follow the directions on the bottle, and this stuff just takes away all the cuticle grossness. I love it! I wash my hands after use, and then apply Solar Oil and lotion. I am so so so happy I found this stuff!!!


Since it is like 10am here in Oklahoma, I thought I would share my morning routine with you all.

I literally sit in front of this computer reading the 70 blogs I am subscribed to. I drink my coffee, and read everything on my reading list. I make breakfast for my munchkins, and then get to work on planning my next manicure, looking at nail polishes, searching for the coveted Connect The Dots polish (which can be bought on ebay for a low price of $89.95!!!), and read read read, comment comment comment. I try so hard to cheer on other nail blogs, comment on new discoveries or awesome manicures, and give any advice if it is asked for. I am working very hard to get this blog going. So I hope all the people I follow do the same thing. Because what I have found in searching for nail blogs: The people with the smallest number of followers always have awesome stuff! No lie. I'm not saying people with a billion followers have lame blogs. They have AMAZING blogs, which is why they have a billion followers. I'm just saying that people like me, who have a few followers, usually have very interesting blogs.

To all you small blogs out there in interweb world: Keep on blogging!! I know I am! Keep up with the dedication and great work! If I have found you, I'm reading!!! If I haven't found you....I WILL!!!

Until next time.....

Christina


Disclosure *I was not paid for this review. I was not given the polish for this review. I paid for the polish with my own money. This is purely my own opinion, thoughts, and suggestions about this polish.*

Wednesday, April 11, 2012

Beetle Juice

After the crazy thick Whimsical, I decided to swatch another polish that I have been DYING to share.

I recently discovered the Wal-mart near my house carries Hard Candy beauty products. My heart skipped a beat when I noticed the VERY small polish selection. I have seen SO many beautiful Hard Candy polishes, I was delighted to be able to see them in person!

The one I decided to purchase is called Beetle. It was $4.00 and 100% worth every single penny.

Wanna know why??


BAM!

Here's what I did:
1 coat Sally Henson's Double Duty base coat
1 coat Orly's base coat
2 coats Hard Candy Beetle
1 coat Seche Vite top coat

On my ring fingers, or accent fingers, as they are fancily called, I did add a stamping pattern using my Konad Special black polish, with Bundle Monster plate BM-208.


I am SO in love. Inside my house, the polish looks more purple/vintaj brassy. But outside it looks more reddish/greenish. I love how the colors change with each angle. I've never had a polish like this before, and I am SO happy Beetle was my first!

I use Solar Oil as my cuticle oil. Like I have said in previous posts, I swear by this stuff. I love it! I even love its weird smell. :)

All of my photos were taken inside, by a window, with my Nikon D5000.

This polish did come with a metallic plastic heart ring. As cheesy as it looks, I will TOTALLY wear that ring!!! <3


Look at that green! YUM!!

I hope you all enjoyed this manicure. It was super easy and I can't stop staring at my nails!!! The application was sooo smooth. I seriously could have just done one coat of this stuff, but I wanted to make sure it was pretty opaque. I am happy it goes on so beautifully in two coats...I think I will be a bit selfish with this polish! ;)

Is this something you would try? Don't forget to check out Wal-mart for Hard Candy polishes! <3

Until next time....

Christina


Disclosure *I was not paid for this review. I was not given the polish for this review. I paid for the polish with my own money. This is purely my own opinion, thoughts, and suggestions about this polish.*

Monday, April 9, 2012

Milani Jewel FX

Hello all! I have an interesting review for all of you.

I recently purchased Milani's Jewel FX in Hot Pink. My daughter, Seyhan, reeeeeally wanted this polish, so I gave in and spent the $4.99 on it at Walgreens. When you look at the bottle, you think "Oh my gosh, this is going to be GORGEOUS!"

And it IS gorgeous. But let me tell you a little bit about why I HATE this polish.

Here is my application process:
A coat of Sally Hansen Strengthening polish.
A coat of Orly's Base Coat.
One coat of Pure Ice Black Rage.
FOUR, let me repeat, FOUR coats of Milani's Jewel FX, Hot Pink.
A coat of Seche Vite.
And to see what it looked like, a coat of Essie's Matte About You.

Ok. I hate this polish. And maybe if I knew how to properly apply it, I would like it. But it was a nightmare. I wanted LOTS of glitter on top of my black. Which I got....after fighting with the glitter through all four coats. It was goopy, yet runny, and every time I did a coat, hardly any glitter would end up on my nail until this giant glob of polish dripped onto my nail. Which then I had to fight with it just to even out. ( I left my ring finger un-matted so you guys could see the shimmer...)

I absolutely love the glitter. I really do. It is VERY pretty. But I will never ever ever plan on using this polish as the main star. I will layer over it, or only use it when I want a few hex glitters.

I seriously feel like I have a layer of cement on my nails. It is SO thick. I cannot wait to take this stuff off.

I am so disappointed. For $5.00, I would expect to get a nice quality polish. I hear that Milani's smaller glitter polishes are amazing...but their chunky glitter polish is a fail in my book. Maybe I will pick up a smaller glitter polish next time I'm at Walgreens. But if it is anything like this, I will be returning it. The only thing keeping me from taking this back to the store, is how much my daughter loves it. I doubt you'll see this on my nails for a while.

Now I'm off to scrub this stuff off, and do another manicure that doesn't require fifty billion coats!!!

Have you tried Milani polishes? Do you like them? I want to hear from YOU!

Until next time....

Christina


Disclosure *I was not paid for this review. I was not given the polish for this review. I paid for the polish with my own money. This is purely my own opinion, thoughts, and suggestions about this polish.*

Friday, April 6, 2012

I fail.

Ok, so I totally fail at not polishing my nails. :( Boo.

Yesterday, my daughter Seyhan and I went to Walgreens, and she helped me pick out some new polish! We got four polishes, but I'm saving two of the names for future posts. ;)

The two I just COULD not wait to try were: Sinful Colors: Big Daddy and Savage.

Oh my golly goodness. I freaking LOVE these colors!

Doesn't that look like some summer yummy goodness??? MMMM. After purchasing these two, I knew I HAD to try something. I loooove love love looooved my manicure I posted yesterday...but can you blame me? Really? Who could resist these beauties?

This photo is with the flash. The pattern and colors kinda make my eyes go bonkers...but I think that is why I love it so much!

No flash.

Here's what I did:
A coat of Sally Hansen's Strengthening base coat.
A coat of Orly's base coat.
Two coats of Sinful Colors Big Daddy.
I used my Bundle Monster plate BM-201 for the pattern. (Isn't it amazing?)
For the pattern: Sinful Colors Savage.
 Then I did a coat of Seche Vite.

 Again, with the flash. Isn't Savage goooorgeous????

No flash.
I am so happy I did this manicure. And I cannot express how much I love these polishes. The application was amazing. The brush is just perfect. And Big Daddy could have gone on in one coat, I just did two to even out any bald patches. I love how opaque both polishes are. It is hard to find solid colors that aren't too sheer these days.

Would you guys try this manicure? What do you think of the color combo?? I want to hear from ya!

Until next time....

Christina

Disclosure *I was not paid for this review. I was not given the polish for this review. I paid for the polish with my own money. This is purely my own opinion, thoughts, and suggestions about this polish.*

Thursday, April 5, 2012

Fancy Dots

Hello readers! I've got a fantastic manicure for you! Seriously, I am SO in love with this one!!

Here's what I did:
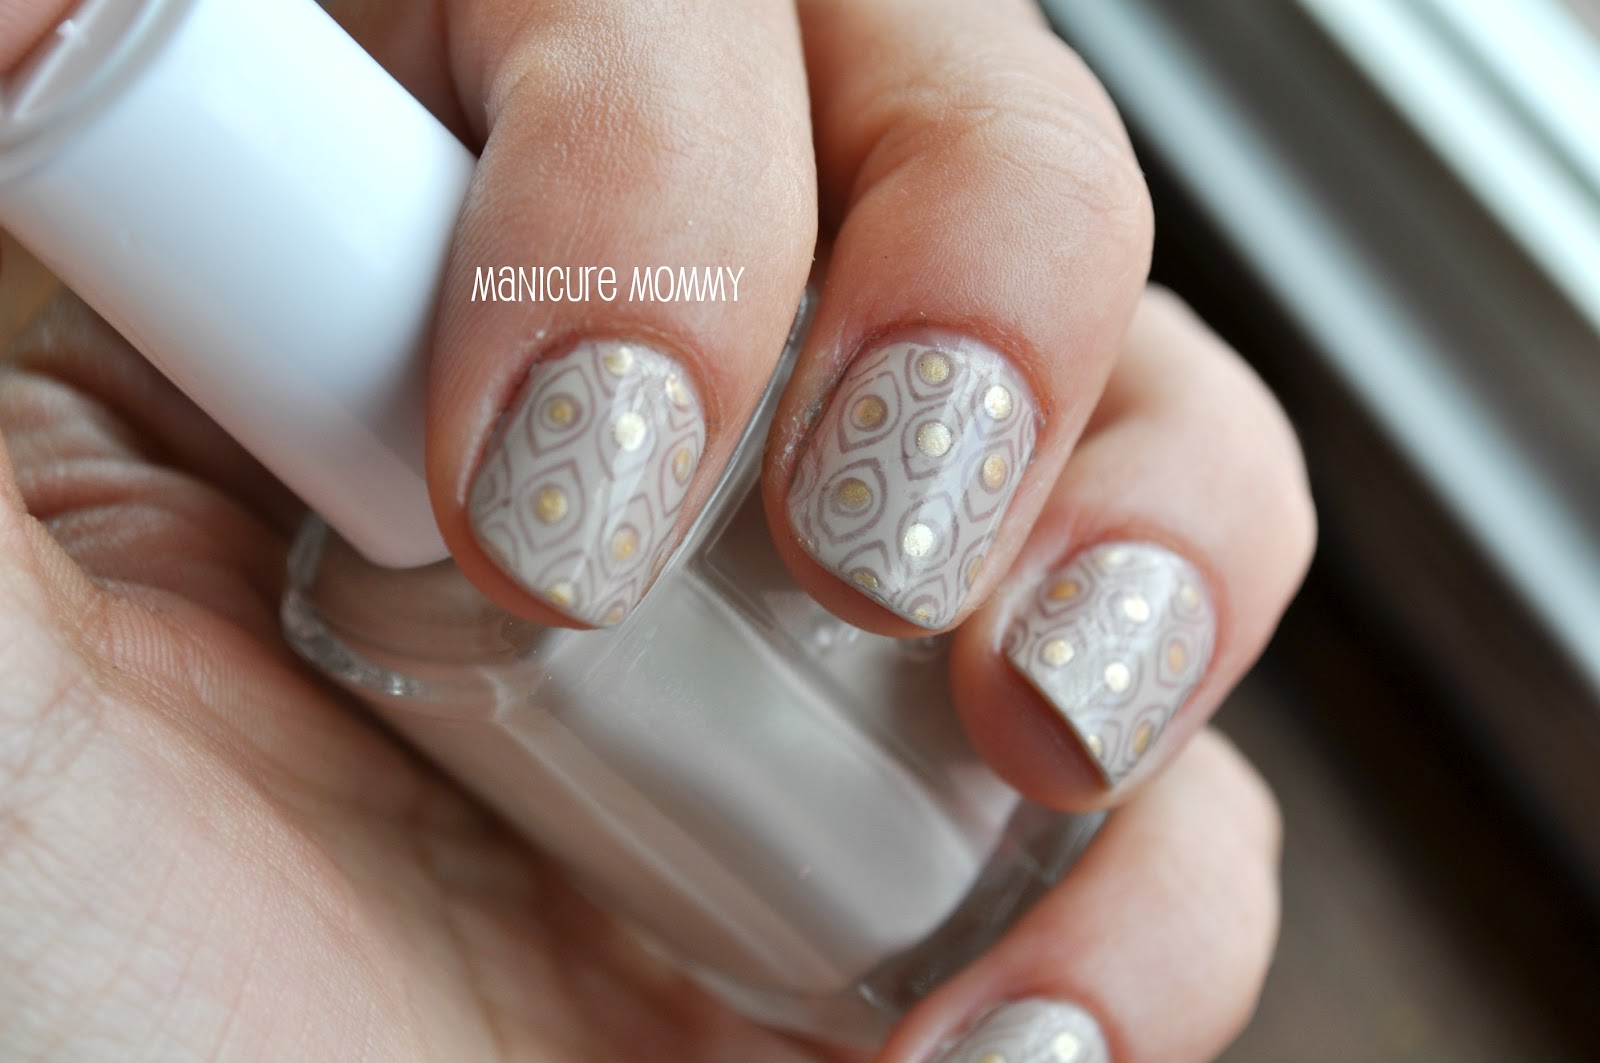
I used Sally Hensen's strengthening base coat, Orly's base coat, two coats of Essie's Sand Tropez.
Then with my Bundle Monster plate: BM-212 (You can buy this awesome bundle HERE), I added the print with Essie's Merino Cool. After that was dry, I decided to fancy it up a bit, and used my new dotters (TOTALLY worth the $4.50 I spent on Amazon: you can buy them HERE. And let me tell you how amazing their customer service is! I accidentally ordered two packages of these bad boys, and one dotter was missing! So they're having it sent out to me asap! Which then, I will give to a good friend of mine.) and added some gold dots with my Pure Ice Jaguar. I then topped it all off with a coat of Seche Vite.

I did this manicure yesterday, so sorry for any tip wear. After several doctor appointments today, my hands are screaming at me! "Don't use your nails to open that box of matzah bread!" "I can't believe you are scraping stickers off things without a tool!" "YOUR NAILS ARE NOT TOOLS!" (They actually said these things to me.)


I am just so impressed with how well this came out! I wanted a manicure that wasn't too flashy or bright....we are having family photos taken tomorrow...and I don't want to look back and say "OH MY GOSH Christina! Why did you wear that BRIGHT green polish with that outfit!!!" This way, I am safe!

All in all, a great manicure!! I highly suggest the Bundle Monster plates for your Konad stamper, or other brand of stamper! Some reviews have said that some of the stamps don't work very well...but I have not found a pattern that didn't work well! But I still have a ton of other plates to go through, so who knows. For the price, I can't complain! :D

Being a nail polish addict, I am trying NOT to paint my nails again until after the shoot tomorrow....wish me luck!

Until next time....

Christina

Disclosure *I was not paid for this review. I was not given the polish for this review. I paid for the polish with my own money. This is purely my own opinion, thoughts, and suggestions about this polish.*